In my last post, I introduced my latest project layout: The MDRAIL Mattawoman Industrial District — a 1×6 shelf-style layout designed to sit over the fireplace mantle in our bedroom. In that post, we covered the overall concept, the available space, and a quick look at the layout plan (track plan and operational design).
In this post, we’ll get into the first phase of construction: building the benchwork using a material called GatorFoam.
This is my first time working with the product, so I’ll also share a little about what it is and my initial impressions from using it.
Let’s jump in.
GatorFoam 
So what exactly is GatorFoam?
According to the manufacturer’s website:
“Gatorfoam is a unique, strong laminate panel with a core of extruded polystyrene and a face made of resin-impregnated wood fiber veneer commonly known as Luxcell. It is suitable for interior and exterior use and works well for structural and model applications. It can be cut with woodworking tools, X-acto or matte knives, accepts most paints, and may be glued using construction adhesive, Aleene’s Tacky Glue (recommended), or adhesive caulking.”
I first heard about GatorFoam from Joe Parker at The Pixel Depot while watching his series How to Build a Small Shelf Layout – Building “The Grunge.” Joe talked about how the material is extremely strong and durable while still being lightweight, which immediately caught my attention.
For a small shelf layout that might need to be moved or handled occasionally, Joe suggested that GatorFoam could be an inexpensive alternative to traditional dimensional lumber. Intrigued, I decided to give it a try. If it works out well, I may consider using it for future projects.
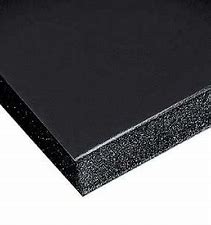
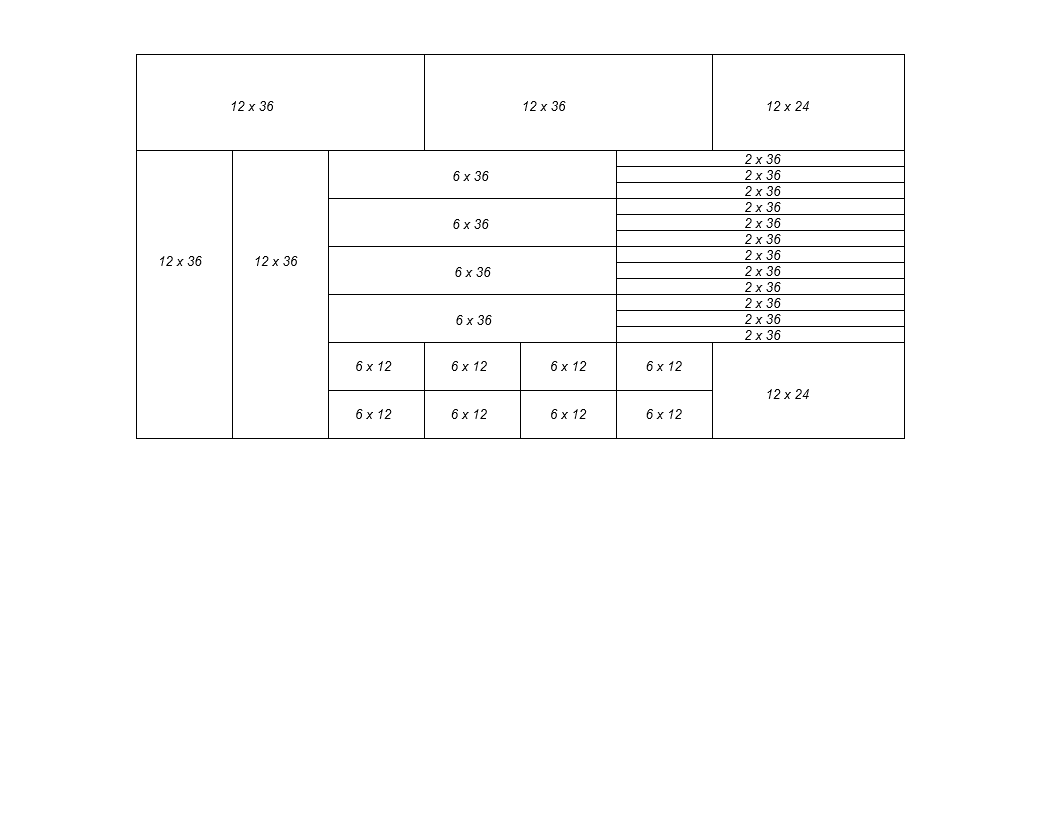
Ordering the GatorFoam was fairly straightforward. I chose a 4’ x 8’ x ½” black sheet. It also comes in white, and there’s a thinner 3/16” option available as well.
After placing the order, Dave at GatorFoam reached out to coordinate how the sheet would be cut. Pre-cutting the sheet makes it much easier to ship and also ensures that the pieces arrive ready to assemble into benchwork.
One thing I learned in the process is that you can lose about 1/8” of material on some cuts. If you’re planning a cutting template, that’s something to keep in mind. I had a couple pieces end up slightly short because of that loss. It’s not a big deal visually, but it’s definitely something I’ll account for next time.
Overall, working with GatorFoam turned out to be pretty straightforward. Dave recommends using construction adhesive, but I found (and he later confirmed) that Aleene’s Tacky Glue works really well. It’s clean, easy to apply, and creates a surprisingly strong bond.
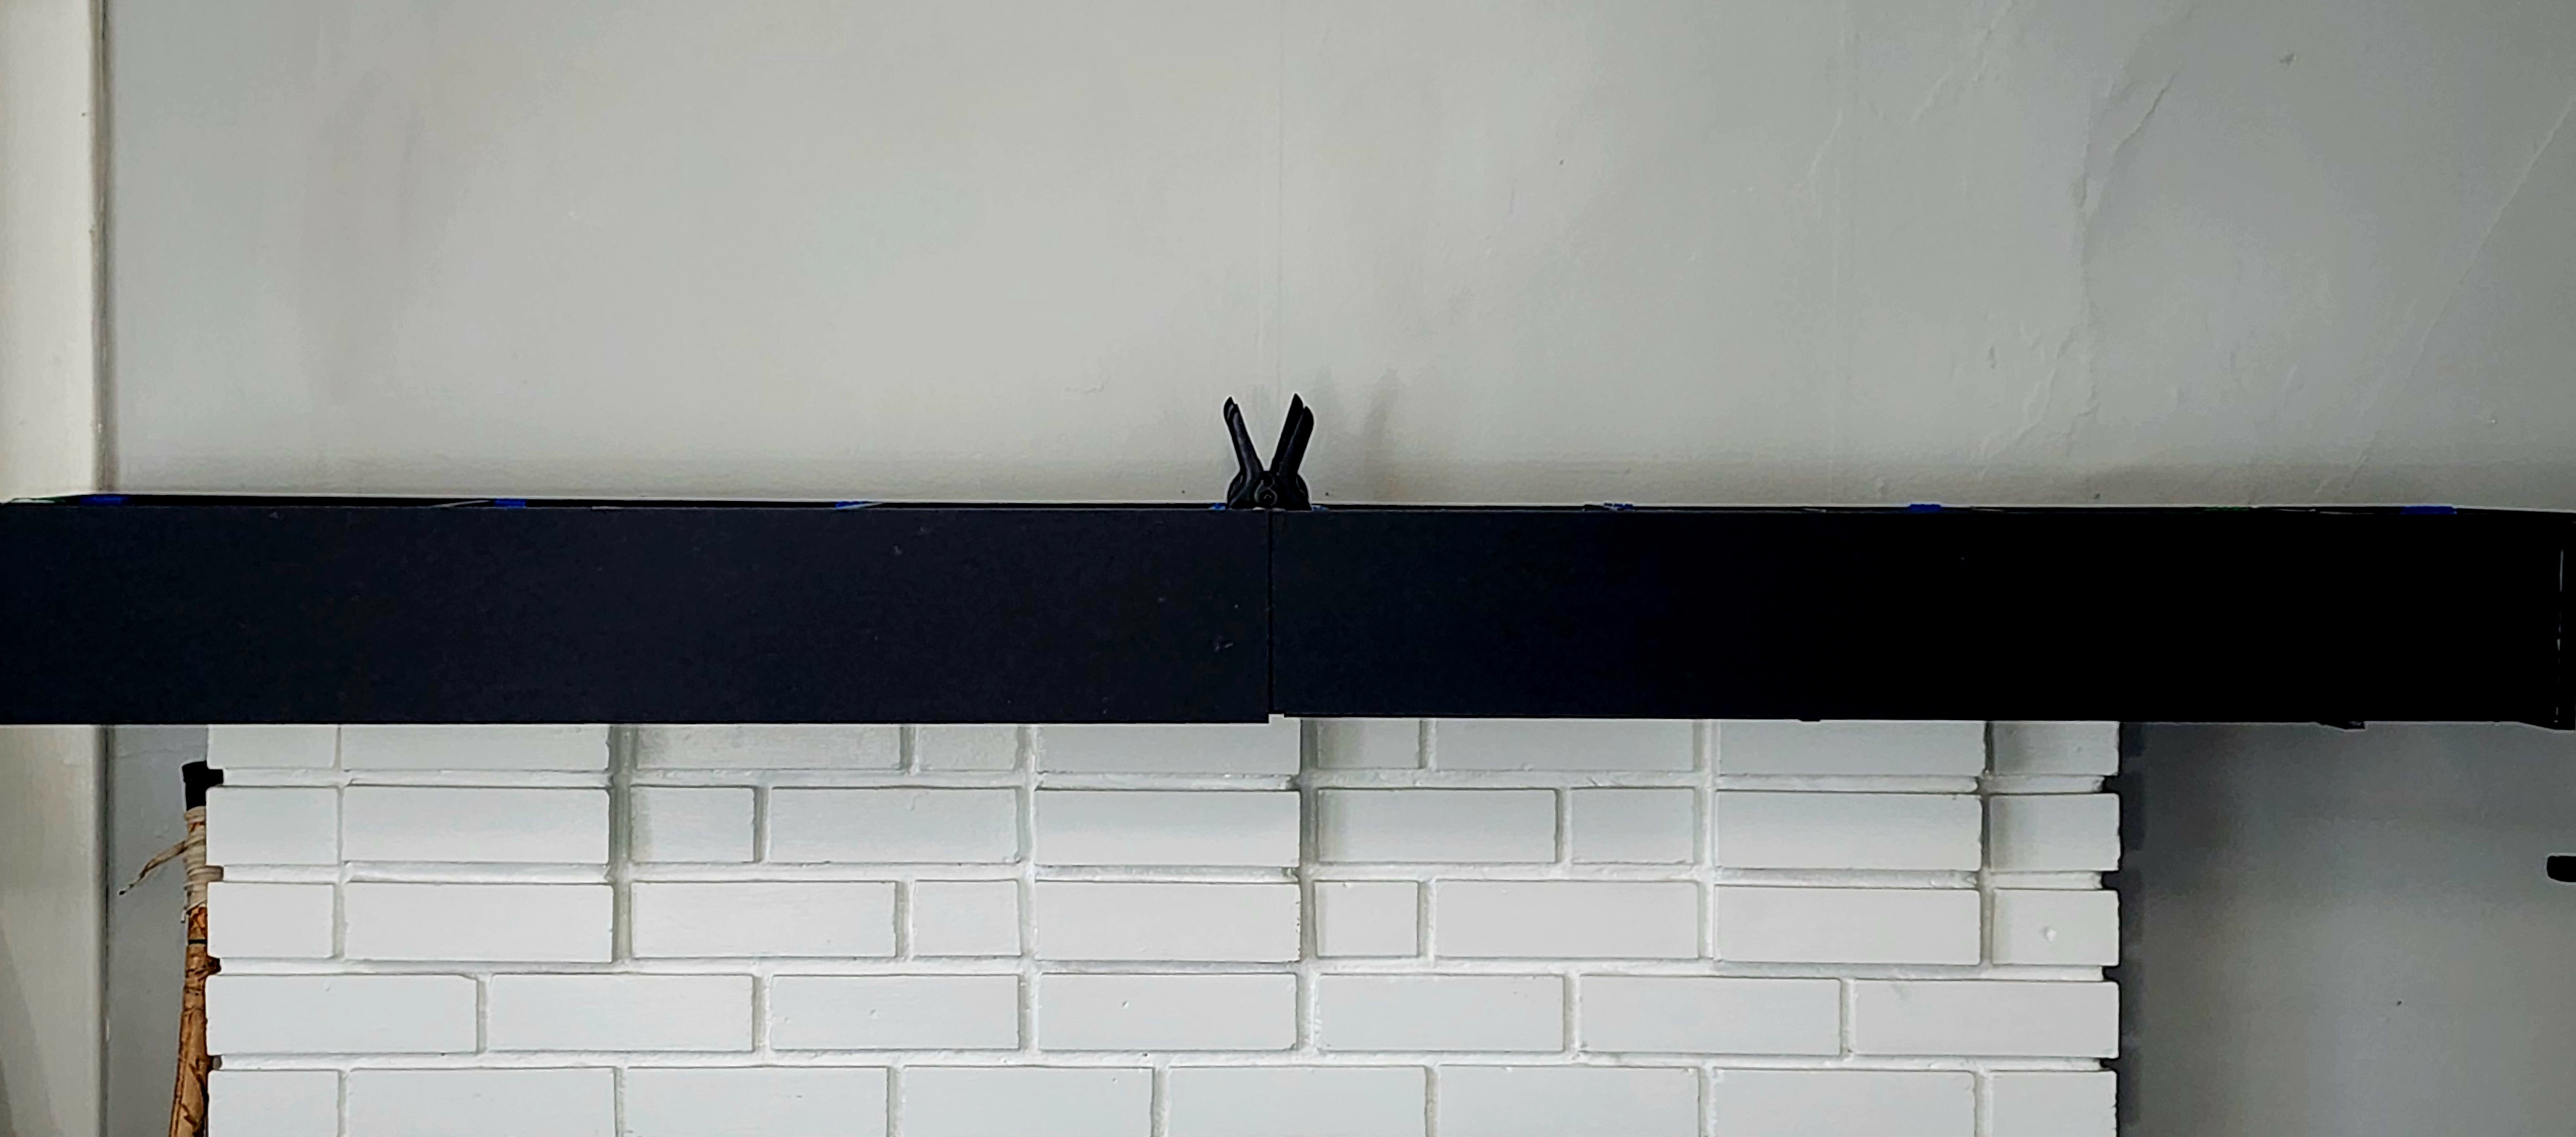
If you decide to work with GatorFoam, it’s also helpful to have 90-degree braces and a variety of clamps on hand to keep everything square while the glue sets.
Benchwork Design
In addition to being lightweight and portable, the benchwork also had to meet one unusual requirement: it needed to fit over a fireplace mantle.
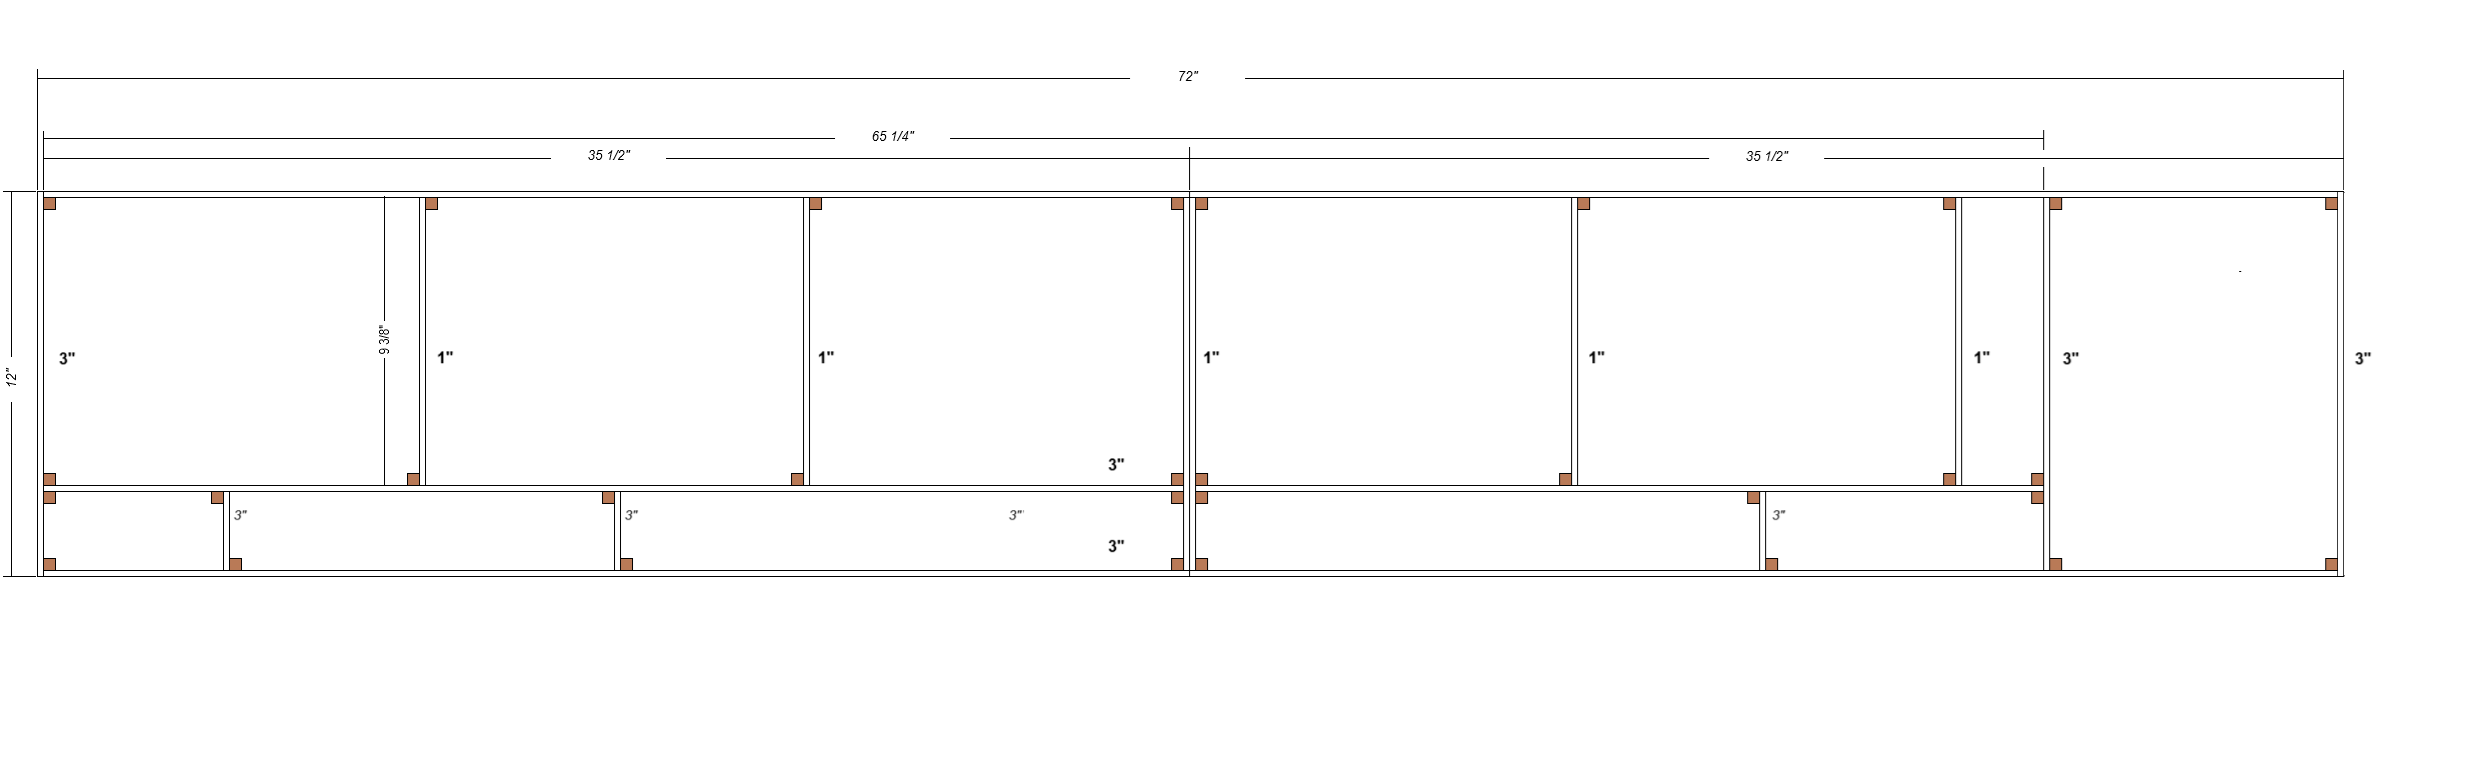
The layout itself measures 1’ x 6’, but the mantle measures 9½” x 5-5½’. Because of those awkward dimensions, I had to get a little creative.
The solution was open-grid style benchwork.
Open-grid construction works like a series of boxes that connect together to form a strong and flexible framework. It’s particularly well-suited to long, narrow layouts, which made it a natural fit for this project.
Two main considerations drove the design.
Consideration #1 – The Mantle

The layout is both wider and longer than the mantle surface, so the benchwork needed to extend beyond it while still remaining stable.
Using the open-grid concept, I designed a box structure that would slide over the three exposed sides of the mantle, essentially cradling it.
Consideration #2 – Portability
Another key requirement was portability. I wanted the layout to be manageable enough for one person to move if necessary.
To accomplish that, I built the benchwork in two 1’ x 3’ sections rather than one continuous piece.
At this point you might be wondering:
“What about the size difference between the mantle and the layout?”
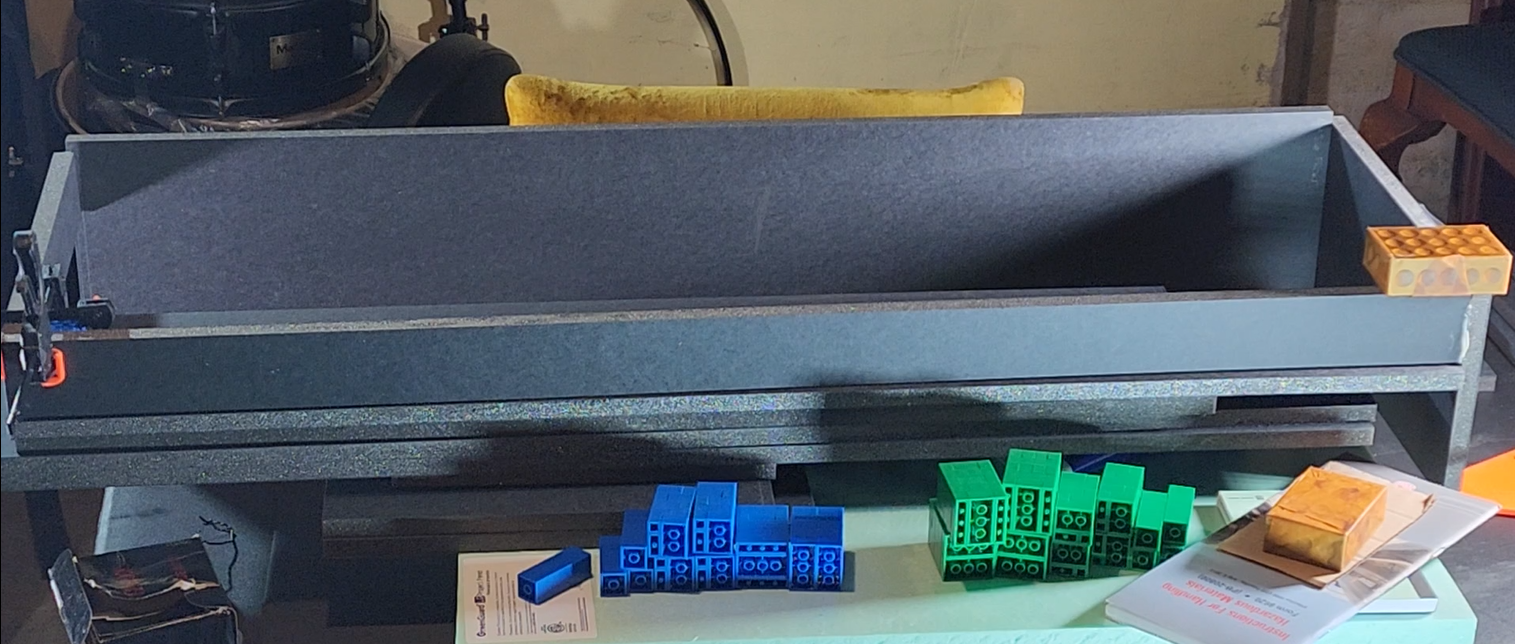
To make everything work, I built the open-grid sections using 6” GatorFoam pieces along the front and outer edges, and 2” strips along the back. This created about 2” of clearance above the mantle and just over 3” of clearance around the mantle edges, allowing the benchwork to slide neatly over it.
I used 2” strips for bracing, and built out the extra depth using scrap 6” pieces.
On the second section of the layout, I also added an additional brace around the 2½-foot mark so the box would still sit snugly against the mantle.
Once both sections were connected, the result worked better than I expected. The two boxes cradle the mantle very snugly with almost no movement.
Initially, I wasn’t sure the benchwork would have enough weight to stabilize itself, but the box design essentially locks it into position, keeping everything true and level.
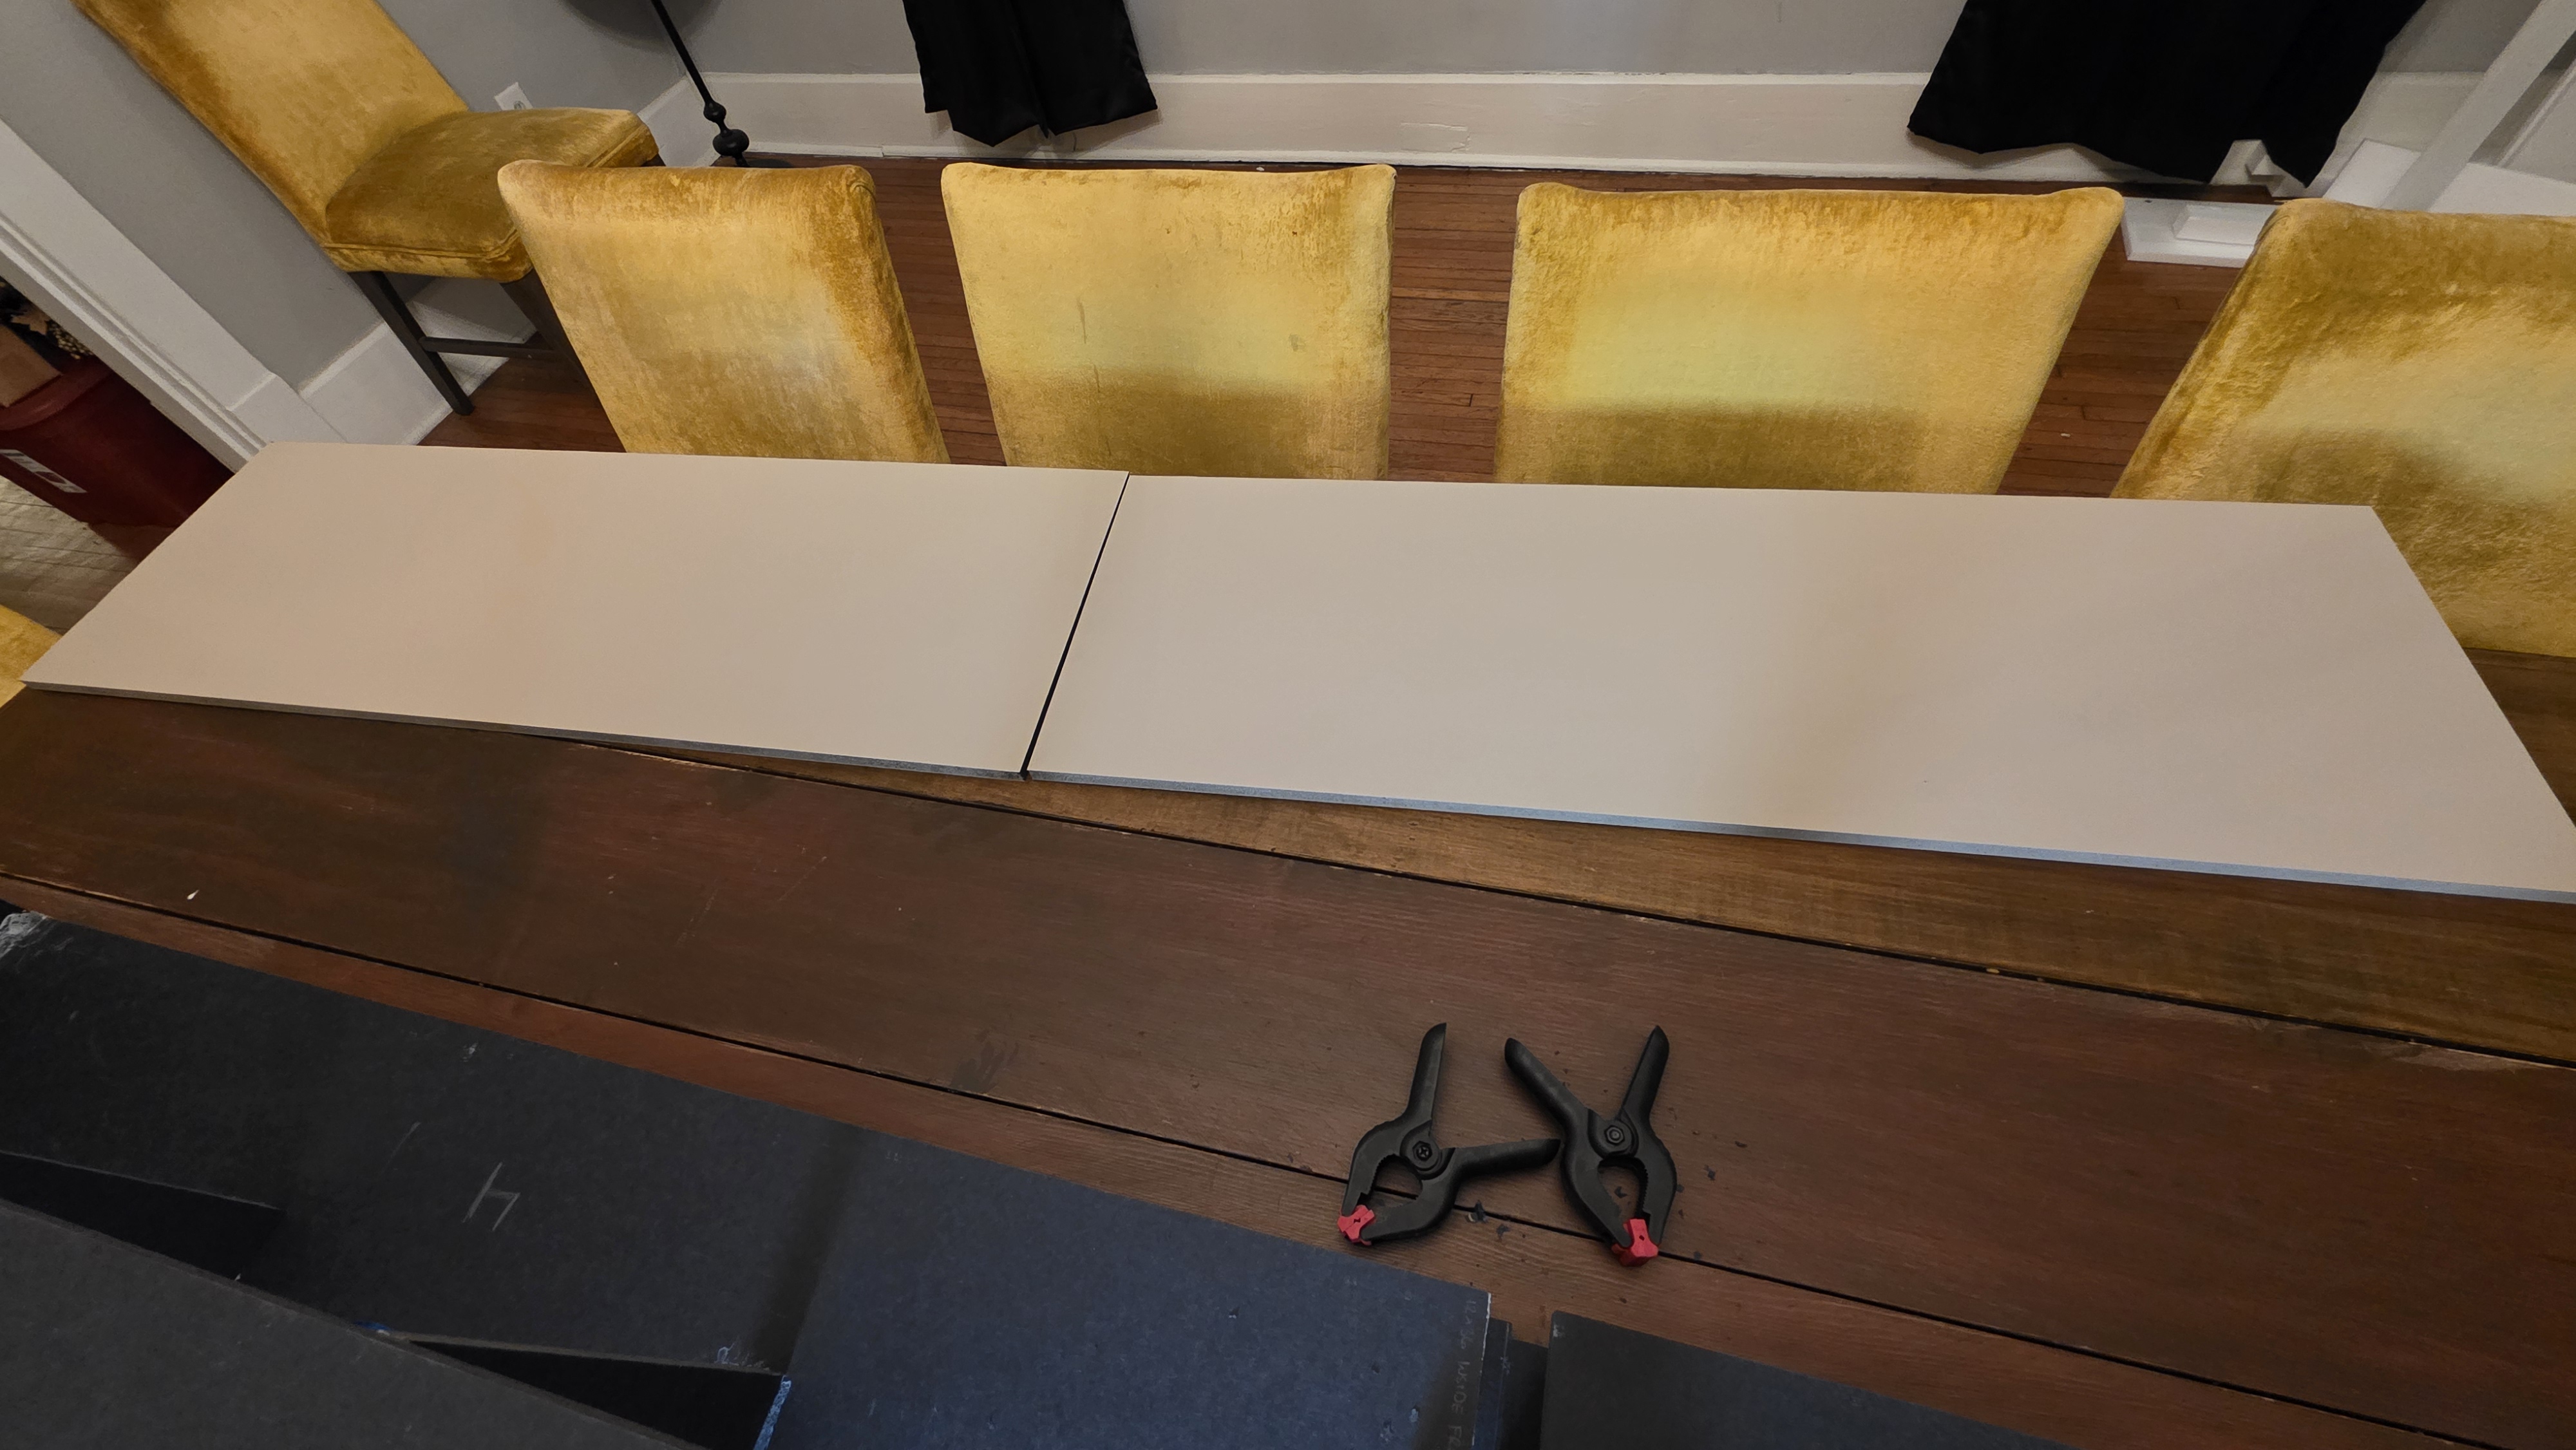
The Base
My original plan for the layout base (sub-roadbed) was to use 1” insulation foam. However, after seeing Joe Parker use GatorFoam in a similar industrial layout, I decided to try it here as well.
Following Joe’s approach, I used two 1×3 GatorFoam sheets as the base.
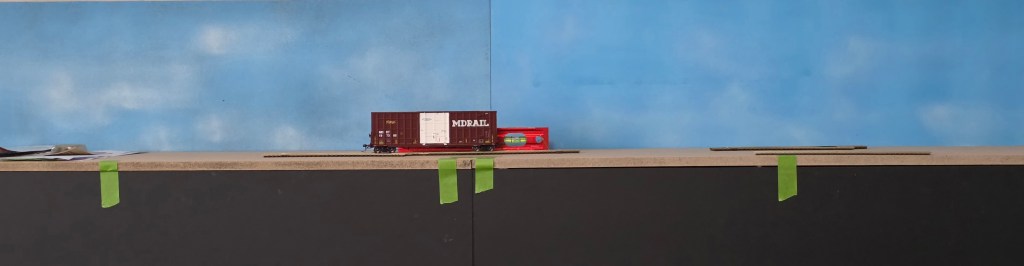
Before attaching them to the benchwork, I painted them a rocky, sandy color to represent the ground tones of the region I’m modeling. Even though MDRAIL is fictional, the layout is set in Southern/Central Maryland, so I wanted the base color to reflect that environment.
I had the paint custom mixed at Lowe’s, since I couldn’t find anything close in the bargain bin. It cost about $18, and while that was far more paint than I needed for this project, I’m sure it will come in handy later.
Once the paint dried, I attached the base sheets using Aleene’s Tacky Glue and my growing collection of clamps.
The Backdrop
For the backdrop, I actually found a sky-blue paint in the Lowe’s bargain bin… about three years ago. (Sometimes it pays to hold onto things.)
Unfortunately, the paint turned out to be extremely thin and didn’t roll on very well. Even after several coats, the coverage was uneven and blotchy.
Not sure what else to try, I grabbed a can of spray primer and began lightly spraying over the panels. My plan was simply to create a more uniform base and then try rolling the blue paint again.
Instead, something unexpected happened.
The primer created a soft, hazy sky effect across the panels — and it actually looked better than anything I could have intentionally painted. Sometimes the best results come from happy accidents.
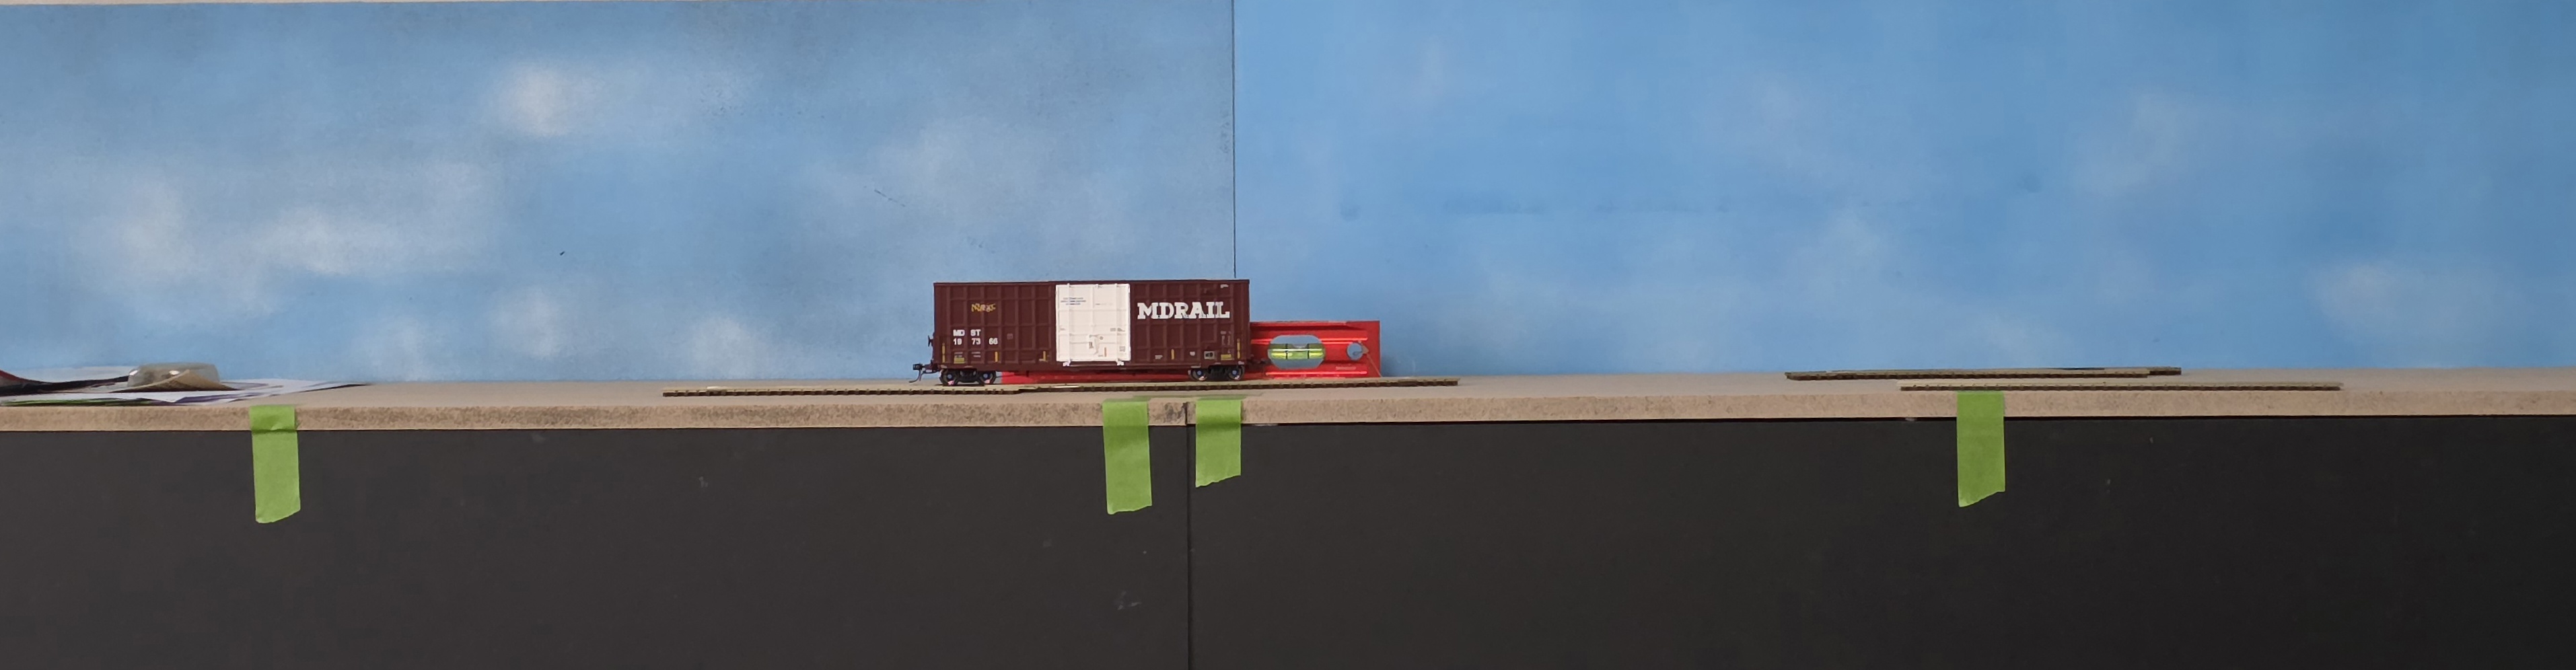
The backdrop panels themselves are 1×3 GatorFoam sheets, mounted flush to the back of the benchwork at about 2 inches above the base. This leaves roughly 9 inches of visible sky.
Looking back, this is one area where I would plan differently next time. Ideally, the backdrop should have been 18 to 24 inches tall. The shorter panels mean I won’t be able to build a lighting valance the way I originally planned, especially since some of the structures will likely be 5 to 7 inches tall.
I may still build a stand-alone valance, but I haven’t committed to that idea yet. Stay tuned.
Final Thoughts (For Now)
Despite a few rookie mistakes along the way, I’m pretty happy with how the benchwork, base, and backdrop turned out.
As I mentioned in the previous post, this layout isn’t just about creating the perfect scene — it’s also about learning, experimenting, and growing as a modeler.
And so far, GatorFoam has been a really interesting material to work with. I definitely recommend giving it a try.
In the next post in the series, we’ll move on to laying the track and connecting the power.
As always, thanks for following along. I’d love to hear what you think about the progress so far — and stay tuned for the next update.
